入门使用
安装并配置
安装 commitlint 和 config-conventional 。
npm install --save-dev @commitlint/{cli,config-conventional}在根目录下新建commitlint.config.js 配置。
echo "export default { extends: ['@commitlint/config-conventional'] };" > commitlint.config.js本地校验
安装 husky 并初始化,接着添加 .husky/commit-msg
hooks 并写入 npx --no -- commitlint --edit \$1。
npm install --save-dev husky

npx husky init

# Add commit message linting to commit-msg hook
echo "npx --no -- commitlint --edit \$1" > .husky/commit-msg
也可以在 package.json 中添加脚本"commitlint": "commitlint --edit"
npm pkg set scripts.commitlint="commitlint --edit"
echo "npm run commitlint \${1}" > .husky/commit-msg
测试失败案例。
git commit -m "foo: this will fail"GitHub Actions 校验
GitHub Actions 工作流如何验证拉取请求中的最后一个提交消息或所有提交消息的示例:
name: CI

on: [push, pull_request]

jobs:
  commitlint:
    runs-on: ubuntu-22.04
    steps:
      - uses: actions/checkout@v3
        with:
          fetch-depth: 0
      - name: Install required dependencies
        run: |
          apt update
          apt install -y sudo
          sudo apt install -y git curl
          curl -sL https://deb.nodesource.com/setup_14.x | sudo -E bash -
          sudo DEBIAN_FRONTEND=noninteractive apt install -y nodejs
      - name: Print versions
        run: |
          git --version
          node --version
          npm --version
          npx commitlint --version
      - name: Install commitlint
        run: |
          npm install conventional-changelog-conventionalcommits
          npm install commitlint@latest

      - name: Validate current commit (last commit) with commitlint
        if: github.event_name == 'push'
        run: npx commitlint --last --verbose

      - name: Validate PR commits with commitlint
        if: github.event_name == 'pull_request'
        run: npx commitlint --from ${{ github.event.pull_request.head.sha }}~${{ github.event.pull_request.commits }} --to ${{ github.event.pull_request.head.sha }} --verbose
自定义配置
下面来看看config-conventional 配置是如何定义的:
module.exports = {
 parserPreset: 'conventional-changelog-conventionalcommits',
 rules: {
  'body-leading-blank': [1, 'always'],
  'body-max-line-length': [2, 'always', 100],
  'footer-leading-blank': [1, 'always'],
  'footer-max-line-length': [2, 'always', 100],
  'header-max-length': [2, 'always', 100],
  'scope-case': [2, 'always', 'lower-case'],
  'subject-case': [
   2,
   'never',
   ['sentence-case', 'start-case', 'pascal-case', 'upper-case'],
  ],
  'subject-empty': [2, 'never'],
  'subject-full-stop': [2, 'never', '.'],
  'type-case': [2, 'always', 'lower-case'],
  'type-empty': [2, 'never'],
  'type-enum': [
   2,
   'always',
   [
    'build',
    'chore',
    'ci',
    'docs',
    'feat',
    'fix',
    'perf',
    'refactor',
    'revert',
    'style',
    'test',
   ],
  ],
 },
};
上面是config-conventional的默认规则,我们可以在 commitlint.config.js 配置文件中覆盖这些规则:
/**
* feature:新功能
* update:更新某功能
* fixbug:修补某功能的bug
* refactor:重构某个功能
* optimize: 优化构建工具或运行时性能
* style:仅样式改动
* docs:仅文档新增/改动
* chore:构建过程或辅助工具的变动
*/
module.exports = {
  extends: [
    '@commitlint/config-conventional'
  ],
  rules: {
    'type-enum': [2, 'always', [
      'feature', 'update', 'fixbug', 'refactor', 'optimize', 'style', 'docs', 'chore'
    ]],
    'type-case': [0],
    'type-empty': [0],
    'scope-empty': [0],
    'scope-case': [0],
    'subject-full-stop': [0, 'never'],
    'subject-case': [0, 'never'],
    'header-max-length': [0, 'always', 72]
  }
};
commitlint工作原理
简单阅读了一遍husky和commitlint的源码,大概的执行过程是这样的,如图所示:
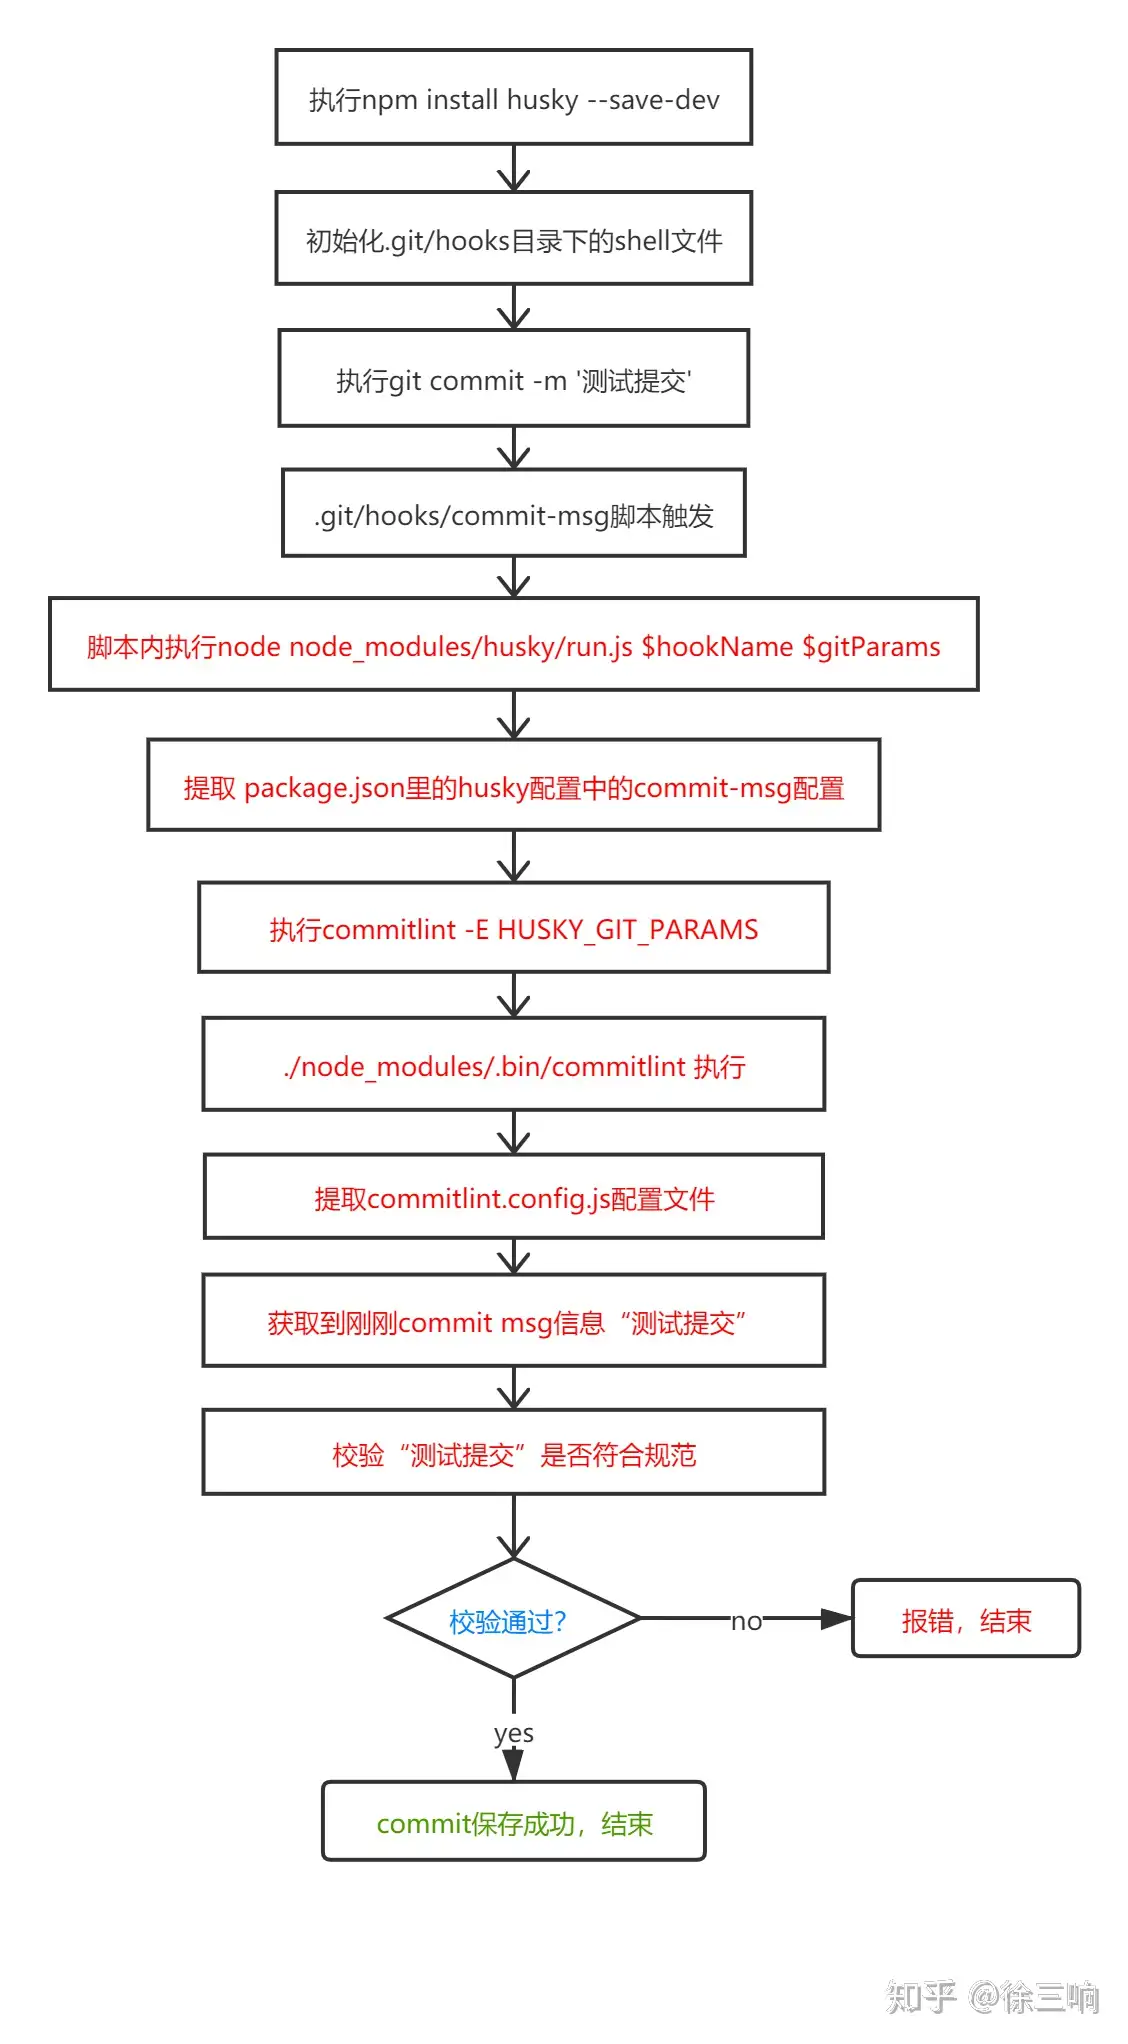
如果上面这张图看不太懂,这没关系,但你至少要看懂下面这张图:
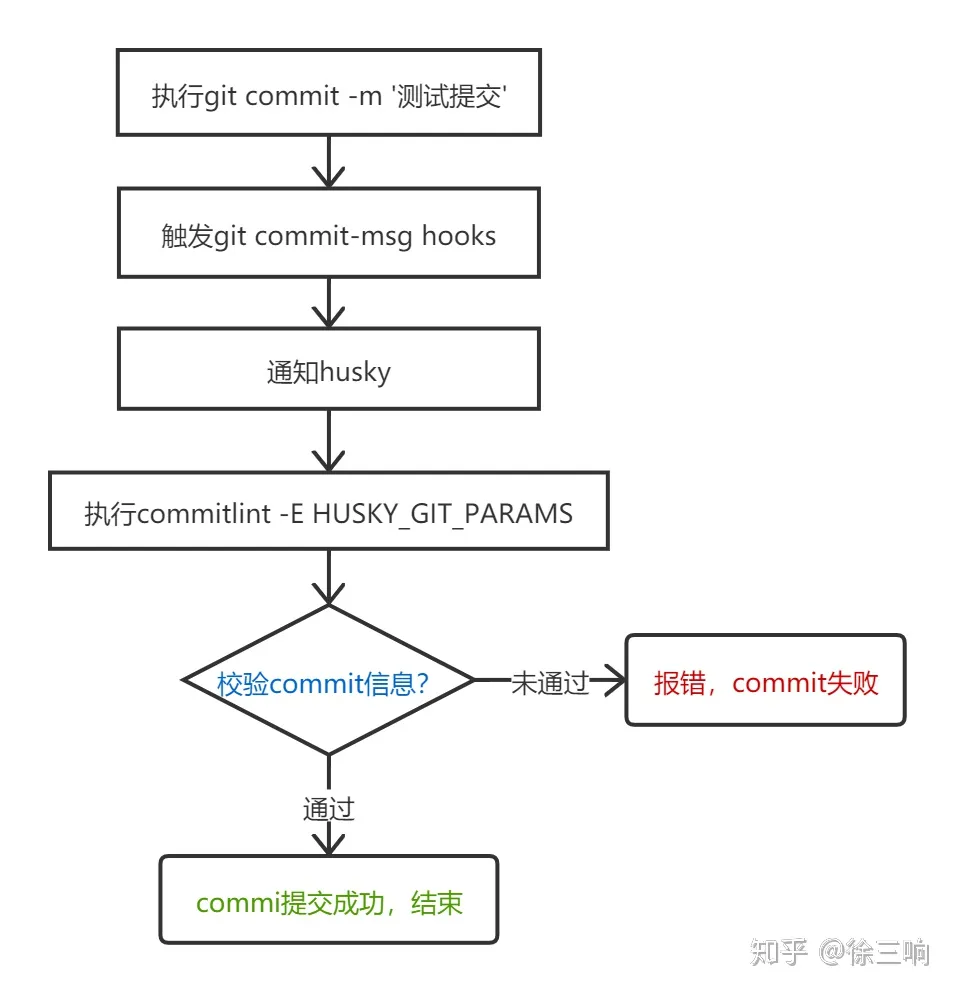
上面我们阐述了git hooks, husky 和 commitlint的工作流程, 理解husky的工作原理非常重要, 后面还会用到它,请大家务必理解。